


A flooring sample is marked at $28 per square metre. The room measures 35 square metres. It is tempting to multiply the two figures and assume the project will cost $980.
That calculation only covers one part of the job.
The final price may also include additional material for cuts, removal of the existing floor, disposal, subfloor preparation, adhesive or underlay, installation, trims and door adjustments. None of those items automatically makes a quote unreasonable. The problem begins when they are not discussed until after the product has been selected.
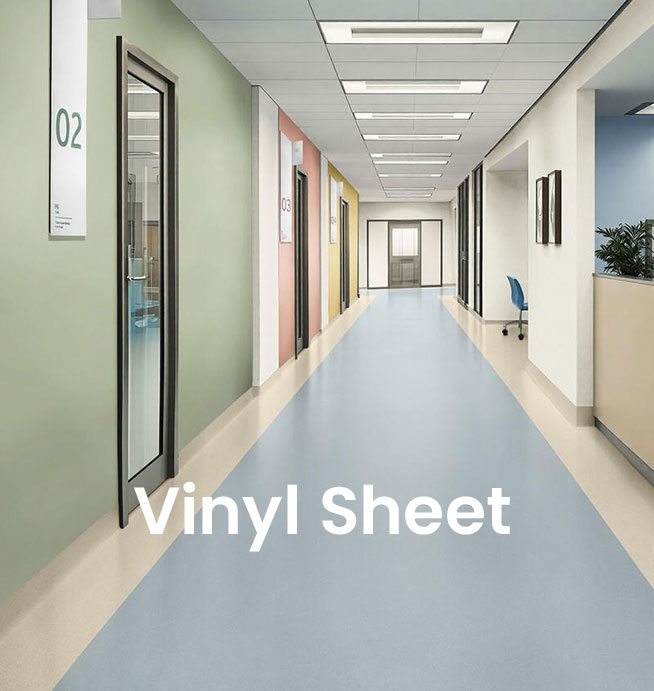
When comparing affordable vinyl flooring options for Melbourne homes and interiors, look at the complete installed scope rather than the product rate in isolation. A lower material price can offer excellent value, but only when the flooring suits the room and the surface beneath it is ready for installation.
Vinyl flooring is available in sheet, plank and tile formats, with different product ranges, surface finishes, wear layers and installation systems.
At the time of review, Melbourne Flooring lists selected standard vinyl plank and vinyl tile products from $28 per square metre supply only. Selected vinyl sheet products start from $35 per square metre supply only. These are indicative starting prices, and the final amount can change according to the chosen range, stock availability, order quantity and site conditions.
The advertised rate normally answers one question:
What does the material cost?
It does not necessarily answer:
What will the completed floor cost?
A useful quotation should clearly separate the product price from the work required to install it.
A complete vinyl flooring budget usually has several layers.
| Cost area | What may be included |
|---|---|
| Flooring material | The selected vinyl sheet, plank or tile product |
| Additional material | Cuts, layout requirements and spare flooring |
| Existing-floor removal | Uplift of carpet, vinyl, laminate or other flooring |
| Waste disposal | Loading, transport and disposal of removed materials |
| Subfloor preparation | Cleaning, repairs, levelling or old-adhesive removal |
| Installation materials | Adhesive, underlay, primer or smoothing compound |
| Installation labour | Measuring, cutting, fitting and finishing |
| Trims and transitions | Doorways, edges and changes between floor types |
| Furniture movement | Moving and replacing furniture where agreed |
| Final adjustments | Door clearance or minor finishing requirements |
| GST | Confirmation that the quoted total includes GST |
Ask for these items to be identified before accepting the quote. A single total is difficult to compare when it is unclear what sits behind it.
A less expensive vinyl product can still be a sensible choice. However, the condition of the existing floor may have more influence on the final cost than the difference between two product ranges.
Vinyl generally follows the surface beneath it closely. If the subfloor contains cracks, raised joints, adhesive residue or uneven areas, those imperfections may need to be corrected before the new flooring is installed.
Imagine two rooms of the same size.
Room A has a clean, level surface that needs little preparation.
Room B has old adhesive, damaged edges and a low section near the doorway.
Even if both rooms use the same product, Room B is likely to require more labour and preparation material. Comparing only the flooring rate would hide the most important difference between the two projects.
This is why a site measure matters. It allows the quote to reflect the floor that actually exists rather than an ideal surface that may not.
The most economical format depends on the room and the installation conditions.
Vinyl sheet flooring can create a continuous surface with fewer joins. Room dimensions, sheet width, cutting requirements and seam placement can affect the quantity ordered and the installation plan.
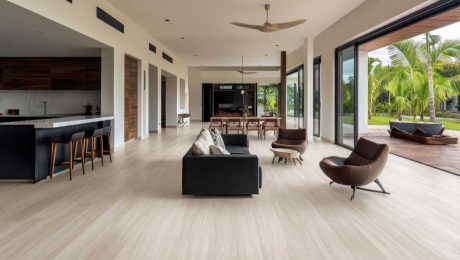
Vinyl plank flooring provides a timber-look finish and is available in systems such as glue-down, loose lay and click-lock. Each method has different preparation and installation requirements.
Vinyl tile flooring offers modular design options and may allow selected sections to be replaced, depending on the product and installation system.
There is no format that is automatically cheapest for every project. A product with a lower square-metre rate may require more labour. Another may cost slightly more as material but suit the existing surface or room layout better.
The fairest comparison is the installed total for the same area and scope. When comparing vinyl flooring supply and installation costs in Melbourne, make sure each quotation includes the same preparation, materials, labour and finishing requirements.
The measured floor area and the order quantity are not always identical.
Additional material may be needed because of:
The quote should show both the measured area and the amount being ordered. This makes the calculation transparent and helps explain why the material quantity may be higher than the room size.
Keeping a small amount of matching material can also be useful if a section is damaged later. Product colours and ranges may change over time, so future replacement stock is not always guaranteed.
A variation is additional work or cost that was not included in the original scope.
Some variations are genuinely impossible to identify until the old floor is removed. Others happen because the quotation was too vague at the beginning.
Before accepting a quote, ask:
The answer should not simply be, “We will work it out on the day.” The quote should explain the assumptions behind the price.
Not every room needs the most expensive product in the range.
A lower-cost vinyl option may be entirely appropriate where:
There are other areas where reducing the budget can create greater risk.
Do not ignore:
Saving on an unnecessary decorative upgrade is different from removing preparation that the floor needs.
When collecting quotations, use one simple comparison table.
| Quote comparison | Supplier A | Supplier B | Supplier C |
|---|---|---|---|
| Product and range | |||
| Material quantity | |||
| Material cost | |||
| Removal and disposal | |||
| Subfloor preparation | |||
| Installation materials | |||
| Labour | |||
| Trims and transitions | |||
| Furniture or access costs | |||
| GST | |||
| Complete project total |
Use the same product specification and project assumptions for each quote where possible.
One supplier may have the lowest product rate but the highest preparation cost. Another may include more work in the original price. The table reveals those differences without forcing every cost into one unexplained total.
A budget should narrow the selection, but it should not replace product assessment.
Review the colour, pattern and surface in the intended room. Check how it appears beside cabinetry, walls and adjoining flooring. Then review the technical information, including the product’s intended use, installation system, maintenance guidance and warranty.
If vinyl sheet is one of the options being considered, compare affordable vinyl sheet flooring colours, finishes and samples before making the final selection. Review the sample alongside the product’s intended use, installation requirements, maintenance guidance and overall project cost.
A floor that costs slightly more but suits the room properly can provide better value than a lower-priced product that requires compromise or early replacement.
The purpose of a flooring budget is not to find the smallest number on a sample label. It is to understand what the completed floor will cost and what that amount includes.
Cheap vinyl flooring can offer strong value when the product is suitable, the subfloor is properly assessed and the installation scope is clear. The most useful quote is therefore not always the lowest one. It is the one with the fewest unanswered questions.
To compare products, assess the existing floor and receive a detailed supply-and-installation price, request a free measure and cost breakdown from Melbourne Flooring.

Commercial vinyl flooring is a great solution for businesses that would like to install long-lasting durable flooring on their premises. There are different suppliers of commercial flooring in Australia. Finding the right flooring supplier and product can often be a tedious task.
When installed correctly, vinyl floors look amazing. Designed to replicate a large number of different styles, you can get the aesthetic appeal of something luxurious at a fraction of the price.
Vinyl flooring can be used to mimic wood, natural stone and tiles, all in a variety of colours and patterns, all while allowing durability and easy maintenance – something which appeals to a large number of commercial users even commercial kitchen vinyl flooring. For more information on commercial vinyl flooring prices and types, you can contact us.
1. Choice of design and type
Designs and manufacture have come a long way since vinyl first appeared on the scene. Vinyl flooring comes primarily in three sizes. Vinyl sheeting is a modern variation of old linoleum, and allows for texture in your flooring, with ease of installation. The fact sheet vinyl can be installed in just one or two solid unbroken pieces means it is a better barrier to moisture, which is why in areas where moisture is a regular occurrence such as the kitchen, it is often chosen over planks and tiles.
Vinyl tiles enable you to make a pattern on your floor area or create a more natural look. Vinyl planks mimic hardwood planks and come in a range of lengths and widths – small herringbone pieces for example enable you to recreate a traditional floor style that is still very much on-trend.
2. Durability and sustainability
Vinyl flooring is extremely durable. There are a number of coating options you can choose to help increase scuff and mark protection, but vinyl is usually resistant enough in areas of normal foot traffic.
One extra advantage of vinyl tiles and planks is the ability to change certain areas of the floor without needing to replace the whole area, so is a great option for busy offices and commercial kitchens. It is a cost-saving option in the long run. For even speedier installation and the ability to change the flooring, loose lay is the perfect solution. Another advantage is that vinyl has become a more sustainable option, usually containing a high proportion of recycled material.
3. Ease of maintenance and installation
One key advantage of vinyl over its fabric counterparts is its ease of cleaning. Vinyl resists liquid, so any spillages or drops can quickly be mopped up, and they won’t sink into the material and leave a stain. Dust and dirt can easily be cleaned from vinyl flooring too, which makes it ideal for areas that need to maintain high hygiene standards. For more details on how easy it is to maintain contact us and talk to our experts.

One of the most difficult and challenging home remodeling tasks is trying to remove an old linoleum or vinyl flooring. Even when the linoleum is removed, things only get worse because you’re faced with gobs of old glue or adhesives that seem all over the floor.
Linoleum & Vinyl Flooring Removal Considerations
Removing old linoleum or vinyl is time-consuming and difficult because wood, which is a common subfloor, is porous and so absorbs the adhesives. The reason why linoleum glue must be removed from the wood or any other subfloor is that some older adhesives had oils in them that chemically react with new vinyl and cause yellow discoloration.
The second reason the glue or any other adhesives must be removed from vinyl flooring is that the new floor covering can become brittle. In addition, any bumps or cracks in an old floor will appear on your new linoleum.
It is necessary for homeowners to be aware that asbestos was used in some old linoleum and flooring adhesives, particularly those made in the 1970s and earlier. It has some serious health risks when working with this material. If you’re not sure about possible asbestos, break a small piece and take it to an asbestos abatement firm for testing.
If there is no asbestos in your flooring materials, there are three ways you can remove vinyl or linoleum floors by yourself, depending on the subfloor.
Buying or renting the following tools will make your task much easier to remove any vinyl or linoleum floor:
When your subfloor made up of plywood, you have two different choices:
First, you can cut the old flooring into parallel strips about 6 inches wide using a utility knife. You can use a hammer to tap a stiff putty knife or brick chisel under the linoleum to break it loose. Pull up the linoleum in strips to reveal the backing or the glue. Once you removed the surface layer, use a paint scraper to remove the linoleum glue. Using a heat gun to soften the glue as you scrape it away can help you to do the task easier.
To remove the linoleum and subfloor altogether, drill a hole through the floor to figure out how thick the plywood is. Set the saw blade to cut just 1/8 inch deeper and cut away a section of flooring on one corner of the room. To cut flush against the walls, use a reciprocal saw, be careful not to cut the floor joists. Cut the floor into small sections about 3 or 4 feet long as you continue to remove it.
While this option would be more labor intensive, it eliminates the step of removing linoleum or vinyl glue.
Steps to remove linoleum or vinyl glued to wood is very similar to the process mentioned above.
Firstly, remove enough covering in a corner till you can find which way the flooring runs. Cut 6-inch-wide strips in the same direction the floor runs to minimize any chances of cutting across the grain. Contrary to a plywood subfloor, we have to be very careful as we scrape since we want to keep that beautiful hardwood below without any damages.
Set the utility knife blade just deep enough to get through the linoleum or vinyl. Heat the linoleum with a heat gun and then pry it and the glue up while the glue is still soft. Scrape away as much of the glue as you can while being careful not to damage the floor. Clean the floor very well and then sand away any remaining glue and refinish the floor.
This is probably the easiest type of subfloor to remove linoleum or vinyl flooring.
Cut the flooring into strips about 6 inches wide. Pull up the linoleum in strips to reveal the linoleum glue. Use a heat gun to soften it, and then pull it off. The remaining glue can be scraped using a floor scraper or soaked overnight with water and dish soap, which helps soften the glue. Finally, use a paint scraper to remove the linoleum glue.
A very common alternative to removing old linoleum or vinyl floors is to put a new one right over it. If the existing floor is still smooth or can be smoothed with a few patches, then the new floor can be laid on top of the old vinyl or linoleum floor.
If you prefer to place a new flooring type on top of your linoleum or vinyl floor, you have two different options. First, a layer of 1/4-inch plywood is laid over the old floor to provide a smooth base and then you can place the new resilient floor on top of it. The second option would be raising the old floor with a self-leveling concrete, about 1/8-inch thick. The put the new floor on that.
We at Melbourne Flooring provide some of the lowest prices and quality services in the supply and installation of floors.

Let's socialize
Copyright © 2018 Melbourne Flooring . All rights reserved. Designed by Momawebmasters
Monday - Friday 9AM - 5PM
Saturday 10AM - 3PM
Sunday by appointment only
Bayswater Branch
Address: 20 Scoresby Road, Bayswater VIC 3153
Phone: 03 9070 8292
Oakleigh Branch
Address: 200 Warrigal Rd, Oakleigh VIC 3166
Phone: 03 4060 1415